This Website uses third-party cookies, which are owned by a person or organization other than KATIA from which KATIA has contracted a service to monitor and improve the services offered on its Website. This third party processes the data gathered by its cookies.


How to make a crochet bag with cross-stitch embroidery

Learn to combine 3 textile techniques to make a one-of-a-kind bag full of colour and texture
06/27/2023
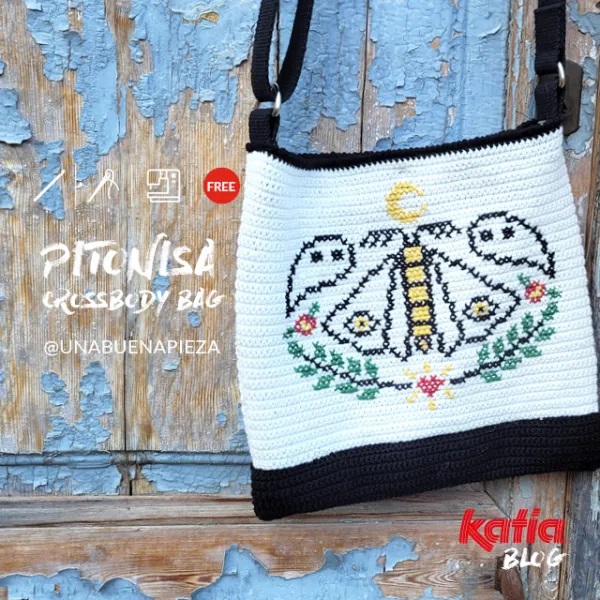
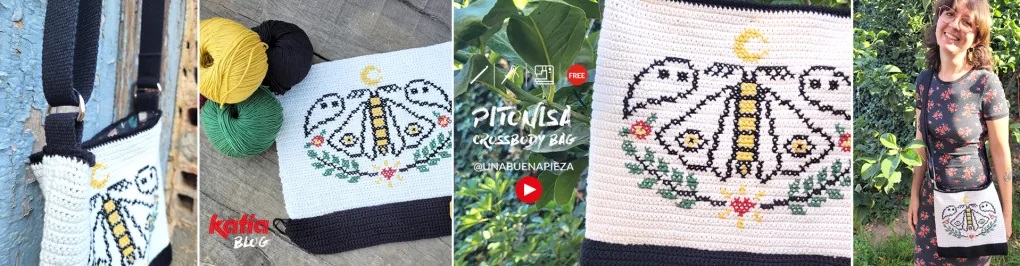
Create a masterpiece that you can wear thanks to a unique pattern and easy-to-follow tutorial from cross-stitch designer and studio owner Anna Mimó, aka @unabuenapieza.
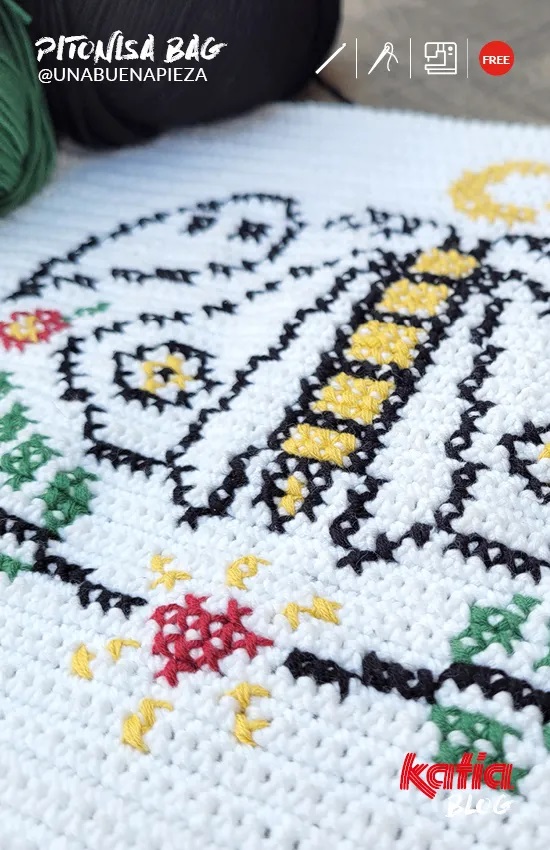
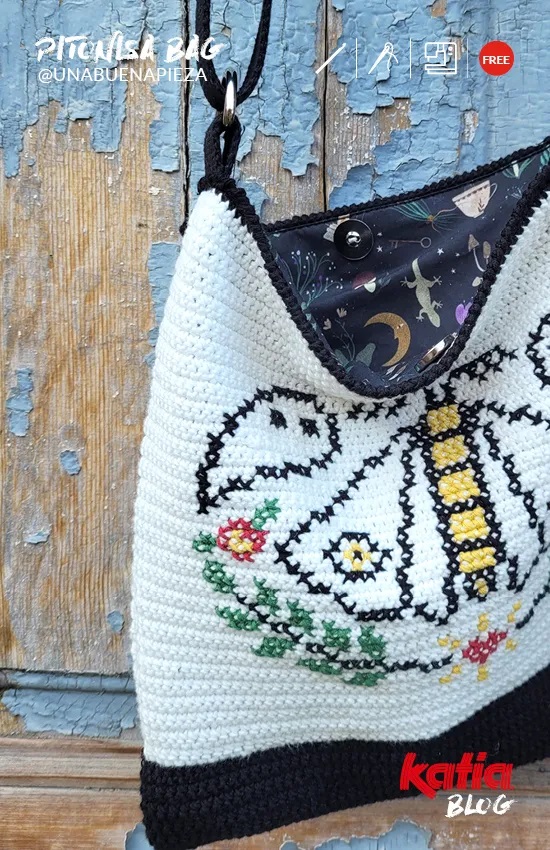
She combines different textile techniques and is inspired by mystical and magical ideas and creations. This is reflected in the bag’s name (Pitonisa means fortune-teller or sorceress) and its motif, with its ghosts, crescent moon, flowers, twigs, and large moth. Add a sense of magic to your own wardrobe and improve your crafting skills at the same time as you crochet, embroider and sew.
Follow the simple steps, videos, and patterns and you’ll soon have a gorgeous new accessory handmade by you!
The 3 techniques you will put into practice:
- Crochet: To make the bag durable and strong.
- Embroidery: To decorate it with the unique cross-stitch design.
- Sewing: To join the parts of the bag together and to add the lining and adjustable strap.
The materials you will need to complete this project are:
For crocheting your bag
- 1 ball of black
- 2 balls of a neutral colour
- Crochet hook 3 mm
For the embroidery of your bag
- 1 ball of red
- 1 ball of mustard yellow
- 1 ball of bottle green
- Tapestry needle
For making the rest of your bag
- 0.3 metres of Katia Cotton Poplin
- 2 metres of 30 mm black backpack strap
- 2 silver-coloured 30 mm metal D-rings
- 30 mm silver-coloured metal sliding buckle
- Magnetic clasp or buttons to close the bag
- Sewing thread
- Scissors
- Measuring tape
- Sewing machine (optional)
Make your Pitonisa cross-stitch bag:
Crocheting the bag itself
- With the Katia Fair Cotton in black (#2), chain 70 stitches.
- Work in single crochet, in rows back and forth, until you’ve created 4.5 cm worth.
- Switch to Katia Fair Cotton in natural (#3) and make 57 rows in single crochet.
- Repeat these 3 steps to make two identical pieces.
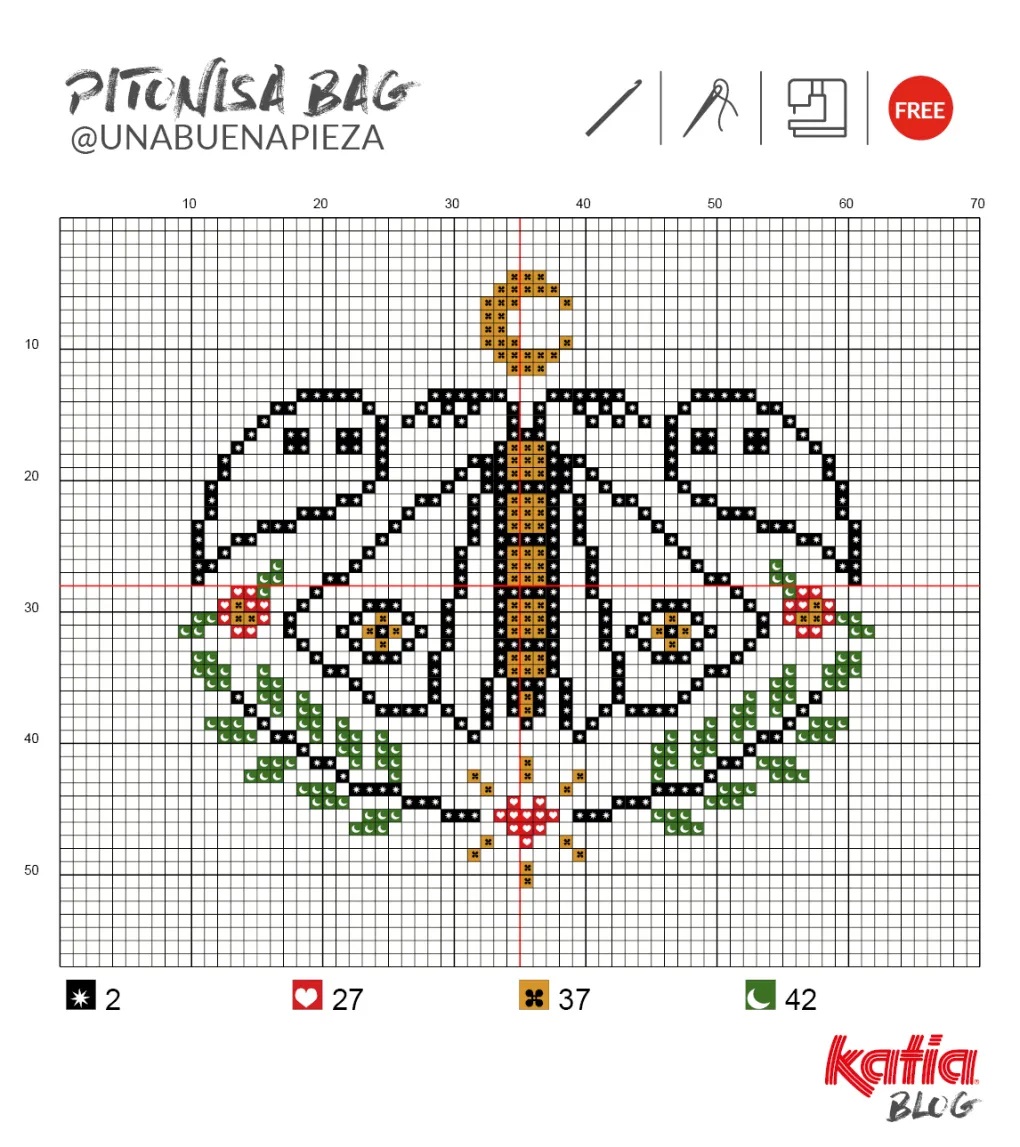
Embroidering: How to cross-stitch on crochet
- Use the chart below: Each square represents making an X on a single crochet stitch.
- Watch the video and put these tips to use:
Video: Cross-stitching on crochet
- Practice cross-stitching to familiarise yourself with the holes in crocheted fabric.
- Don’t make knots! Leave the thread a little long at the beginning and secure it with each stitch on the back of the embroidery.
- Try not to pierce the thread of the fabric with the needle. Look for a well-defined hole before poking the work.
- Start from the centre! In the chart, the centre is at the intersection of the two red lines.
- The cross stitch on crochet fabric may not be perfect, but it is still beautiful. So, relax and have fun!
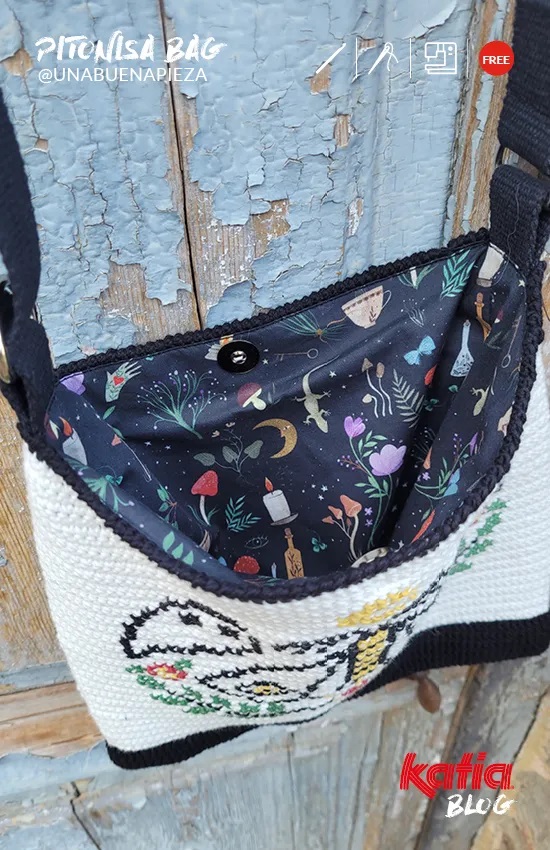
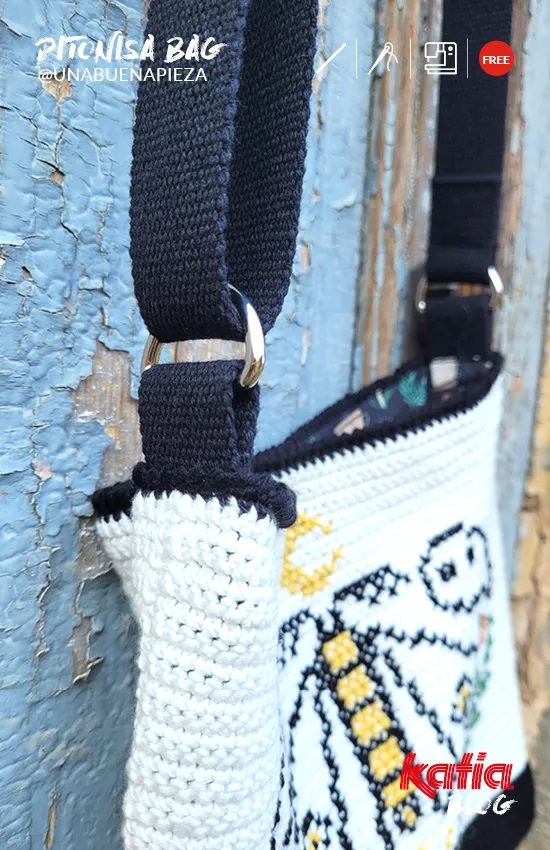
Sewing: The lining and strap
-
Sew the crochet pieces together.
-
Face the right sides (the embroidery facing inward) and sew the sides and base of the bag (black parts).
-
Turn the work right side out and finish the top edge with a single crochet round and a crab stitch round using black Fair Cotton.
-
Prepare the lining by cutting two pieces of fabric the same size as the bag with the following seam allowance: 1 cm on both sides and base & 2 cm at the top
-
Make a simple hem (2 cm) at the top of both pieces. Then, sew them together on the other three sides.
-
For the loops: Cut two pieces of strap 10 cm long, pass a D-ring through each one and fold in half. Sew a loop on each side of the bag.
-
For the adjustable handle: Cut 180 cm of strap and sew one end to the movable bar of the sliding buckle. Pass the other end through one of the D-rings, then through the buckle, and finish by sewing it to the other D-ring.
-
Sew the fabric lining inside the bag and finally add a magnetic clasp to close your new and magical Pitonisa bag.
Validate your login
Sign In
Create New Account